Fashion

Thrifting Tips

thrift shopping

The best part about thrift shopping is getting amazing clothes for a bargain. A Calvin Klein red rain coat for $5. Yes! Ralph Lauren sweaters for under $10? Hell yes! Despite these steals it can be hard to get the desire to go to the thrift store, especially when I don’t have the time or patience. Here are some of my tips so you can have a hassle-free and enjoyable time when you go thrift shopping.

  1. Go in with a plan: Looking for a denim jacket? Need a new party dress? Either way, think about what you are really looking for and make sure you go to those sections first. Thrift stores are overwhelming and sometimes very scattered, so being organized will help you prioritize your time.
  2. Dress appropriately: I get it, your chunky heeled boots, bodycon dress, or 10 layers of clothes make you look very stylish; however, they’re not the most practical things to wear. I don’t care what people say, leggings and a plain t shirt make trying on clothes very easy. If you do want to still be dressed up then choose clothes that will be comfortable when trying on the item you are looking for. For example, if your number one priority is to get a new pair of jeans then dress in something that will make trying on pants easy. The point here: dress in an outfit that will be very easy to take on and off in the dressing room.
  3. Don’t buy something just because of the price: I get it. I’m a sucker for deals too, but don’t let that trap you into something you will never wear. In the end you’ll end up wasting your money.
  4. Do not buy something that needs to be altered (unless you are actually serious about altering it): If you are anything like me you will try something on in the fitting room, make plans in your head about the changes, and then go home and never do it. Unless you have the skills to make the changes yourself then don’t buy it. Also, sometimes getting something altered can be more expensive than the actual product you are buying, so be cautious of that.
  5. Ask yourself “how am I going to style this with items I already own?” Great, you found a fur jacket that you like. You’re in the dressing room already imagining how to embrace your inner Kim Kardashian by matching the jacket with a tight dress and knee-high heeled boots. Well, do you even own the tight dress and boots? Unless you have a very eclectic style, then make sure you are able to match it with clothes you already own so you can get the most use out of your clothing item.
  6. Inspect, inspect, inspect: Even if that Marc Jacobs shirt is only a dollar it’s not worth getting it if there is a stain, rip, or other problems. Just like tip #4, don’t get it unless you are actually able to deal with the problem.
  7. Wander into the mens section: If you have a much more casual style like I do then don’t be afraid to look in the mens section. It’s the perfect place to find a t-shirt or perfectly oversized winter jacket.
  8. Don’t limit yourself to clothes: Thrift shopping is supposed to be fun, so while you are at your local Savers or Goodwill check out other sections. I have found polaroid cameras, books, home decor, and vinyl records for really great prices!
  9. Know the discounts: Most thrift stores offer discounts on certain days of the week or for holidays, so check with your favorite thrift stores to see when you van get items for a really great discount!

Good luck thrift shopping! Let me know what some of your best finds have been.

#sparkinbloom

Standard
Fashion, Organization

Clean Out Your Closet Pt. 1

If you are anything like me then your closet somehow becomes a place to hoard things you forgot you even owned. I knew I wanted to cut down on what I own, but I didn’t want to make this a stressful process. Some guides on how to clean out your closet are very strict in what you can and cannot do. I didn’t want my method to be like that. Instead I wanted an option that would allow me to re-evaluate again in a couple of months without regretting getting rid of any items that I might have wanted to keep.

How to Clean Out Your Closet Part 1:

  1. Take everything out of your closet. When I say everything I mean it. Take out every single item that is in there, even if it is not clothing. By doing this you will start with a blank slate and evaluate everything that is taking up space.
  2. Clean your closet. As you put back items in your closet it will be nice to know that you are putting it into a clean and sanitized area. If you don’t have a clean area then it will be difficult to maintain the quality of many of your clothing items.
  3. Rearrange furniture (if you have any). Taking everything out of your closet will also allow you to re-imagine your space. Maybe there is a new method of organization that will be more efficient for you. Think about what you currently do not like about your closet and see if there is a way to fix it.
  4. Now that your closet is clean and ready to accept new items it is time to sort them into piles. I used the following six piles as my guidelines:
    1. Keep: items that still fit and you have actually worn more than a handful of times.
    2. Maybe: items that fit but you do not wear often.
    3. Storage: items that hold significant memories or meaning to you but that you do not wear.
    4. Donate: items that will be given away.
    5. Trash: items of poor quality that are not suitable for wearing.
    6. Wash: any items that need to be cleaned before being being sorted into a pile. The only items that do not go here are trash items. Also, you decide if you want to put donated items here before you give them away. Personally, I do wash the clothes before I donate them.
  5. Tips/Rules
    1. If a clothing item does not fit you then DO NOT put it in the keep or maybe piles. Only put it in the storage pile if there is a significant meaning to it. Otherwise put it into the donate or trash piles.
    2. Do not abuse the wash pile by putting items there that you don’t want to deal with until later.
    3. Be really picky with your storage items. I suggest getting a specific sized box to put set number of items in.
  6. Now that you have sorted your items do the following
    1. Organize your keep items in your closet to your method of organization. I put mine by type of item (jackets, sweaters, t-shirts, etc.) then sort them by color.
    2. Put your maybe items into a box and keep it in your closet. Since these are maybe items you will have easy access to the clothing in here just in case you may want to use it. By keeping it in the box also forces you to only use these items when you think about it naturally.
    3. Put your storage items in a storage unit outside of your closet. There is no reason for storage items to take up space in your personal closet. Just make sure the storage unit you choose is still easily accessible for the moments you want to look back at these items.
    4. Put all donated items into bags or boxes and donate them ASAP. Remember, these are the items that were holding you back so get rid of them quickly.
    5. Throw away your trash pile.
    6. Launder your wash pile. Repeat step four for the freshly washed items.

I really hope that these tips help you out. Stay tuned for part 2 of the clean your closet series.

Spark in Bloom

Currently, I’m listening to Kygo – Firestone

Standard
DIY

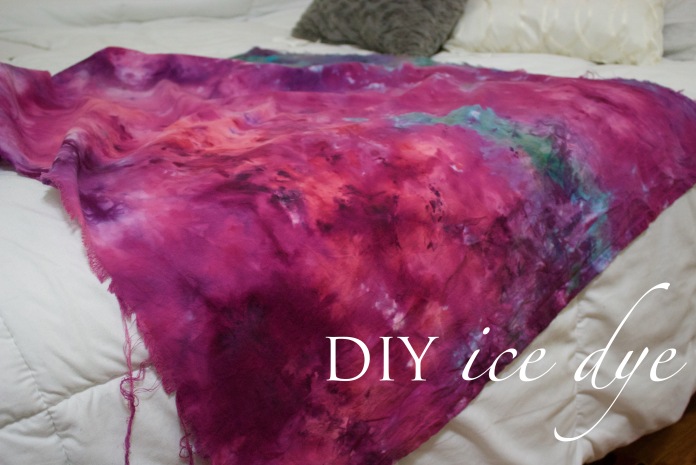
DIY: Ice Dye

IMG_3554 copy.jpg

When I was a kid I used to tie-dye all the time. Now that I’m older I wanted to revisit that hobby in a different way. Ice dye is a unique method of coloring your fabric. Instead of pouring hot liquid over fabric in intricate designs, it utilizes the melting ice to spread the dye into a soft a very blended pattern. This is a very easy method to try and perfect for the summer.

Supplies

  • Fabric – I used 1 yard of 100% cotton fabric
  • Powdered Dye – I used three powdered dye packets
  • Ice
  • Gloves*
  • Container*
  • Racks*
  • Spoon*
  • Optional: soda ash

*since many dyes are toxic it is important that these supplies are only used for this project and that you do not use them with food. 

When choosing a fabric it is important to keep in mind how that material reacts with dye. Natural fibers like cotton often produce the best results. Materials like 100% polyester and acrylic are a hassle to work with. I suggest reading the labels on your dye packets because many brands have different suggestions and warning.

I used one yard of 100% white cotton cloth for my project. Since cotton works very well with dye I don’t find it necessary to pre-soak it in soda ash. Additionally, the tulip powdered dye I used doesn’t list soaking my fabric in soda-ash as an instruction. Once again, read the labels on your dye packets to get the best results!

The colors I used in my project are:

  • Tulip Teal
  • Tulip Violet
  • Rit Petal Pink

Directions

  1. Put the rack on top of your container and set up your work station in an area where the ice will melt easily. Remember, dyes are toxic so do not do this project in a closed space. I recommend doing this project outside, especially during the spring and summer months.
  2. Dampen your material in warm water. String out any excess water.
  3. Place the fabric on the rack in whatever format you choose. I decided to scrunch it up as tightly as I could.
  4. Cover your material with ice. I used 1 bowl of ice.
  5. Using a spoon start sprinkling the powder over your ice. I used up all three packets because I wanted to saturate my fabric as much as possible. If you want more white spots or a lighter color then don’t use as much dye.
  6. Let the ice melt completely.
  7. Put your fabric in a bag and let it sit for at least 24 hours. I let mine sit for 36 hours.
  8. After at least 24 hours rinse your fabric until the water runs clear. I rinsed my fabric in the bath tub.
  9. Run your fabric in the washer by itself and with no detergent.
  10. Dry and enjoy!

I love the effect that this method gives. There are also so many ways to use this as well. I think I might use my fabric to make a pillow. Try it out this summer and let me know how it goes!

#sparkinbloom

Standard
Design

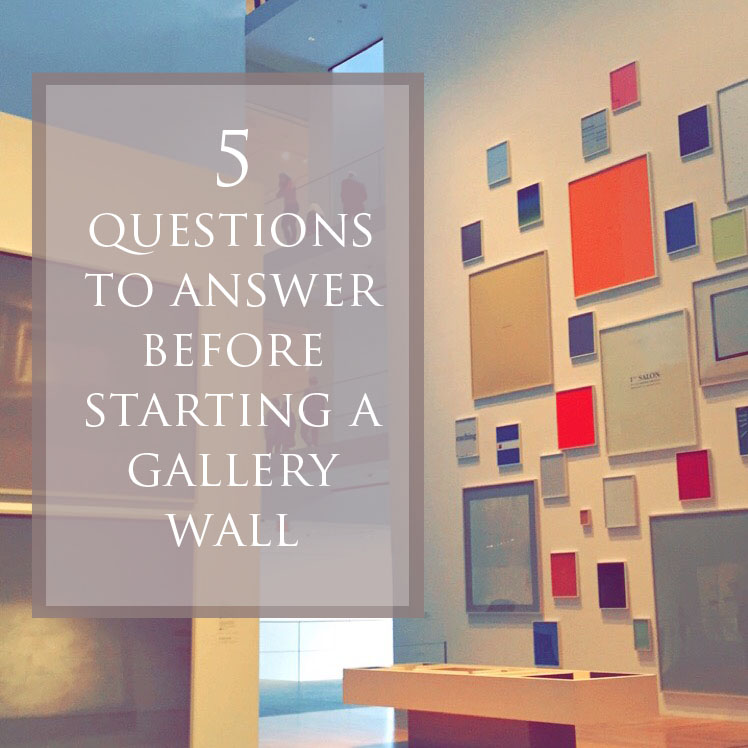
5 Questions to Answer Before Starting a Gallery Wall

Having a gallery wall has always been a dream of mine. I’m currently redecorating my bedroom from ground zero, so I decided to include a gallery wall in my plans. The process of creating a gallery can be costly and time consuming, so before you start your own project here are some questions to consider:
  1. How large do I want my gallery wall to be?
    The scale of the project is often the most intimidating factor. Whether it’s a section above a couch or a whole wall you should consider what the surface area you want to cover is. Smaller areas are always easier to complete than larger ones; however, if you are aiming for a large gallery wall you should not be discouraged as you can start small and start adding pieces as time goes on.
  2. What type of art will my gallery consist of?
    Typically, gallery walls are composed of framed art pieces, however you should never limit yourself to one style of art. Photographs, paintings, posters, and prints are popular options. Don’t forget about other options as well like protruding art pieces or mirrors to get going as well. Additionally, will the art have another underlying theme? Travel? Family? Artist? The options are endless.
  3. How will you display your art?
    A classic approach to creating a gallery wall is by mounting your framed art to the wall. Recently, I have been intrigued by different methods of displaying art. Displaying art on shelves has been a popular trend recently. A lower cost option is to use washi tape. An even more creative option is to use clipboards as the primary display.
  4. What color scheme will my gallery follow?
    There are two color schemes to think about for your gallery. First, what color scheme will the art itself have? Do you want purely black and white white, any color under the rainbow, or a specific set of colors? Second, what color scheme will the structural pieces have? For example, if your wall will consist of purely framed artwork will all the frames be one color? If you are taping or putting your artwork on shelving will they follow a color scheme as well?
  5. What will the dimensions of my art be?
    I have always been fascinated by the organized chaos of a gallery wall; however, recently I have been intrigued by the symmetrical art approach. For the most Type A of personalities this is a very clean approach. For those of us who are taking the classical approach with different sized art you may want to take a few minutes to analyze your smallest and largest items. Staying within a certain size range is more appealing to the eye.
For more gallery wall inspiration check out my pinterest board. Good luck with your gallery wall!
Spark in Bloom
Currently I’m listening to Adele – Million Years Ago


Standard
Food, Recipes

Gluten Free Superfood Coconut Banana Bread

In an effort to be healthy I always buy bananas, so whenever I see super ripe bananas on the counter I get a little upset at my failed attempt to make better food decisions. I will usually put the bananas in the freezer to use in a smoothie or make banana ice cream, but this time I decided to make banana bread. I kept this recipe gluten free by making my own oat flour (make sure your oats are gluten free) and added qi’a as an extra superfood feature. Qi’a is basically a mixture of chia seeds, buckwheat groats, and hemp seeds.

Ingredients

  • 2 cups oat flour
  • 1 ½  tsp baking powder
  • ½ tsp baking soda
  • ½  tsp salt
  • 4 ripe bananas
  • 1 tbs coconut oil
  • ½  cup honey
  • ¾  cup coconut flakes
  • ⅓  cup qi’a (optional)

Instructions

  1. If you are making your own oat flour simply put around 3 cups of dry oats into a dry blender and blend on medium for a few minutes until the oats start to break down to a flour like consistency. If you do not have a high-power blender then I recommend blending your oats then after a few minutes putting on a sieve to collect the flour. Put the remaining oats back into the blender and repeat the process until you have two cups of oat flour.
  2. Put the oat flour, baking powder, baking soda, and salt into a bowl and set aside.
  3. In a blender put in 4 mashed bananas, coconut oil, and honey. Blend until smooth.
  4. Put the banana mixture into the dry mixture and incorporate together.
  5. Mix in the coconut flakes and qi’a.
  6. Put the mixture into a loaf pan and bake for 35 minutes at 350 degrees.

Feel free to add any other ingredients like chocolate chips or chopped nuts. Enjoy!

Spark In Bloom

Currently, I’m listening to Fleetwood Mac – Rhiannon

Standard
Travel

Top 5 D.C. Museums

One of the best parts about living in D.C. is the access to free museums. It kept me busy on the weekends and my bank account extremely happy. Although I no longer currently live in D.C. I still get asked what the best attractions are. With so many options it’s hard to fit everything in a short trip. Whether you are on a budget or want to learn something new, visiting a museum is an absolute D.C. must! Here are my top 5 free museum recommendations:

  1. National Gallery of Art 6th & Constitution Ave NW, Washington, DC 20565
    There are many art galleries in Washington D.C., but the National Gallery of Art triumphs them all. The National Gallery of Art consists of three areas. The west building is the main attraction. It’s two floors and includes a wide variety art including sculptures, drawings, painting, and photographs from many different backgrounds and time periods. This is the one building to go to if you are visiting the gallery. The west building also has one of the best museum stores that I have ever been to, so if you want a D.C. souvenir or a gift for a friend who loves art then I recommend looking there.
    The east building hosts contemporary and modern art. It’s not as crowded as the west building, and it can be seen pretty quickly. If you are going to both buildings take the underground concourse by the food court instead of going outside (I promise it’s cool)  The sculpture garden is the west of the west building. All the sculptures are in an outside garden and can be seen on your way to your next destination. Depending on how in-depth you are when you go to museums, I would recommend around three hours to go through all three sections.
  2. Renwick Gallery 1700 Pennsylvania Ave NW, Washington, DC 20006
    The Renwick Gallery recently opened up in November 2015 after a two year renovation. Located right next to the White House, the gallery is a smaller and the most recent exhibition Wonders hosts about 9 contemporary art pieces. What I love about this gallery is that their are so many different perspectives to view the structures and that photography is highly encouraged. Located right next to the White House it is a simple and quick visit. Overall, this museum would probably take no more than an hour. My tip: get there a few minutes before the gallery opens to be the first person there so you get the best views and pictures.
  3. United States Holocaust Memorial Museum 100 Raoul Wallenberg Pl SW, Washington, DC 20024
    If you want to leave Washington feeling humbled then I highly recommend going to this museum. It’s probably one of the more crowded museums in D.C., but I promise that it is worth it. The powerful imagery and abundance of information makes this museum so powerful. There aren’t enough words to describe how important and emotional this museum can be. Get there early because the lines can be really long. Once you are inside save about three hours to get through most of the museum.
  4. Air & Space 600 Independence Ave SW, Washington, DC 20560
    This museum is a lot of fun, especially for the youngsters. The museum itself if visually appealing with all the hanging and floor artifacts. There is also a planetarium and IMAX theater situated in the museum. Entrance into the museum is free but some of the activities inside do require a payment. An hour and a half should be enough to see just the exhibitions. Note: this museum is not the Udvar-Hazy Center, which displays thousands of artifacts.
  5. National Postal Museum 2 Massachusetts Ave NE, Washington, DC 20002
    The National Postal museum is probably one of the most underrated museums in D.C. The museum itself is hardly crowded and it includes fun activities for the kids. One of the best activities is to take the 6 complimentary stamps that you can choose to start a stamp collection.For the older audience go to the PostSecret exhibition and read the post cards. Save about an hour and a half to get the most out of this museum. The National Postal Museum is located right next to Union Station where you can shop, grab a bite to eat, or go to your next destination.

Spark In Bloom

Currently, I’m listening to Esther – To Let Go

Standard